This family activity repurposes food waste and found plant cuttings to create beautiful botanical designs on eggs to enjoy & to eat! Celebrate spring-time rejuvenation through this earth-conscious craft.
MATERIALS
- Eggs
- Vinegar (white or apple cider)
- Food scraps: onion skins, red cabbage, or avocado skins
- Plant cuttings: weeds, flowers, leaves
- Nylons or panty hose
- Twine or rubber bands
- Scissors
- Pot & water for producing natural dye
- Mugs / spoons for dipping eggs into dye
ADVANCE PREP
- Hard boil eggs
- Collect food scraps like: onion skins, beets and beet root, red cabbage, or avocado skins. Store separately.
- Collect small weeds, flowers, and plant cuttings for decorating your eggs
STEPS
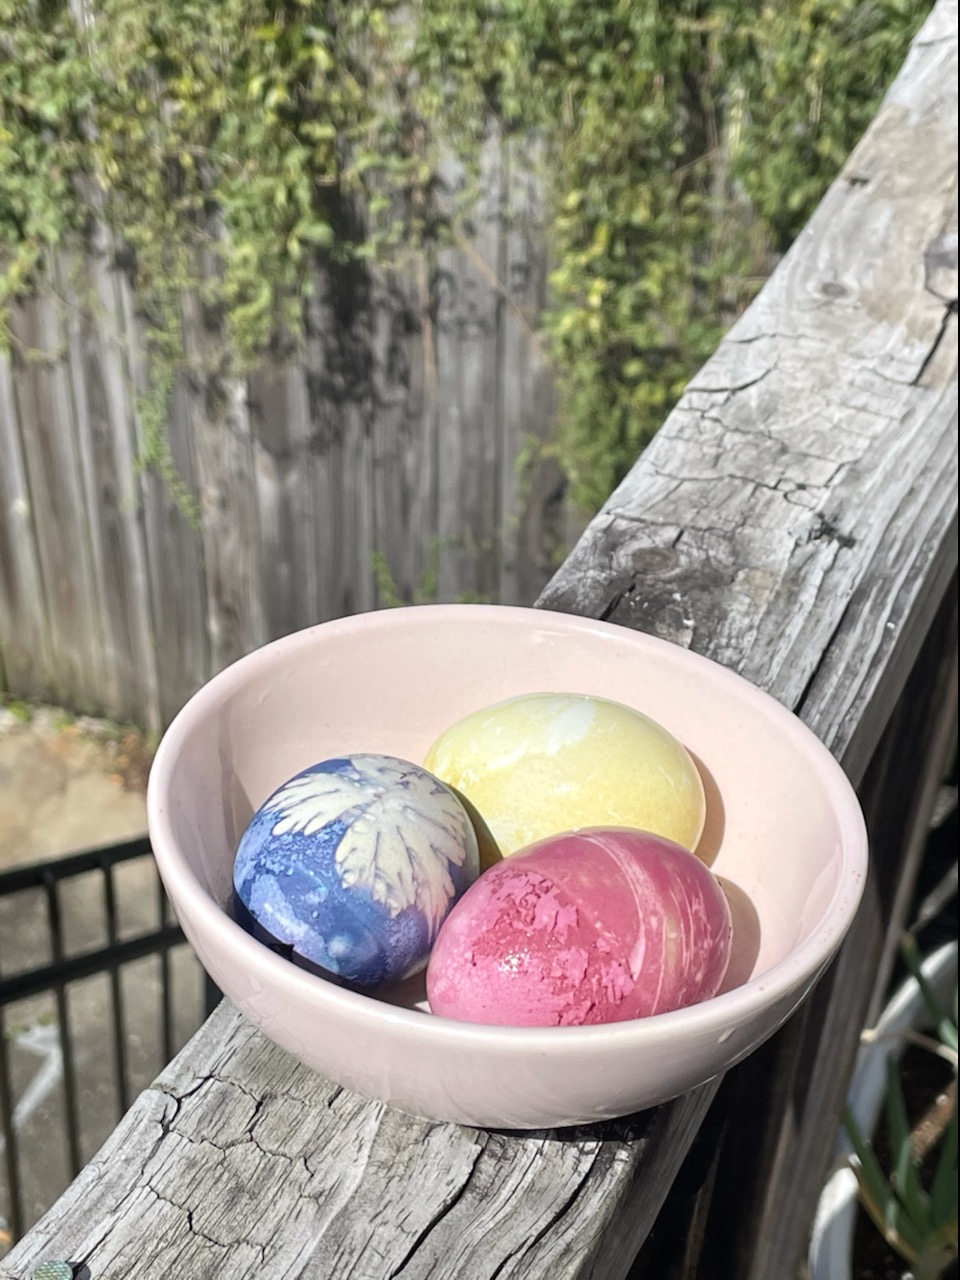
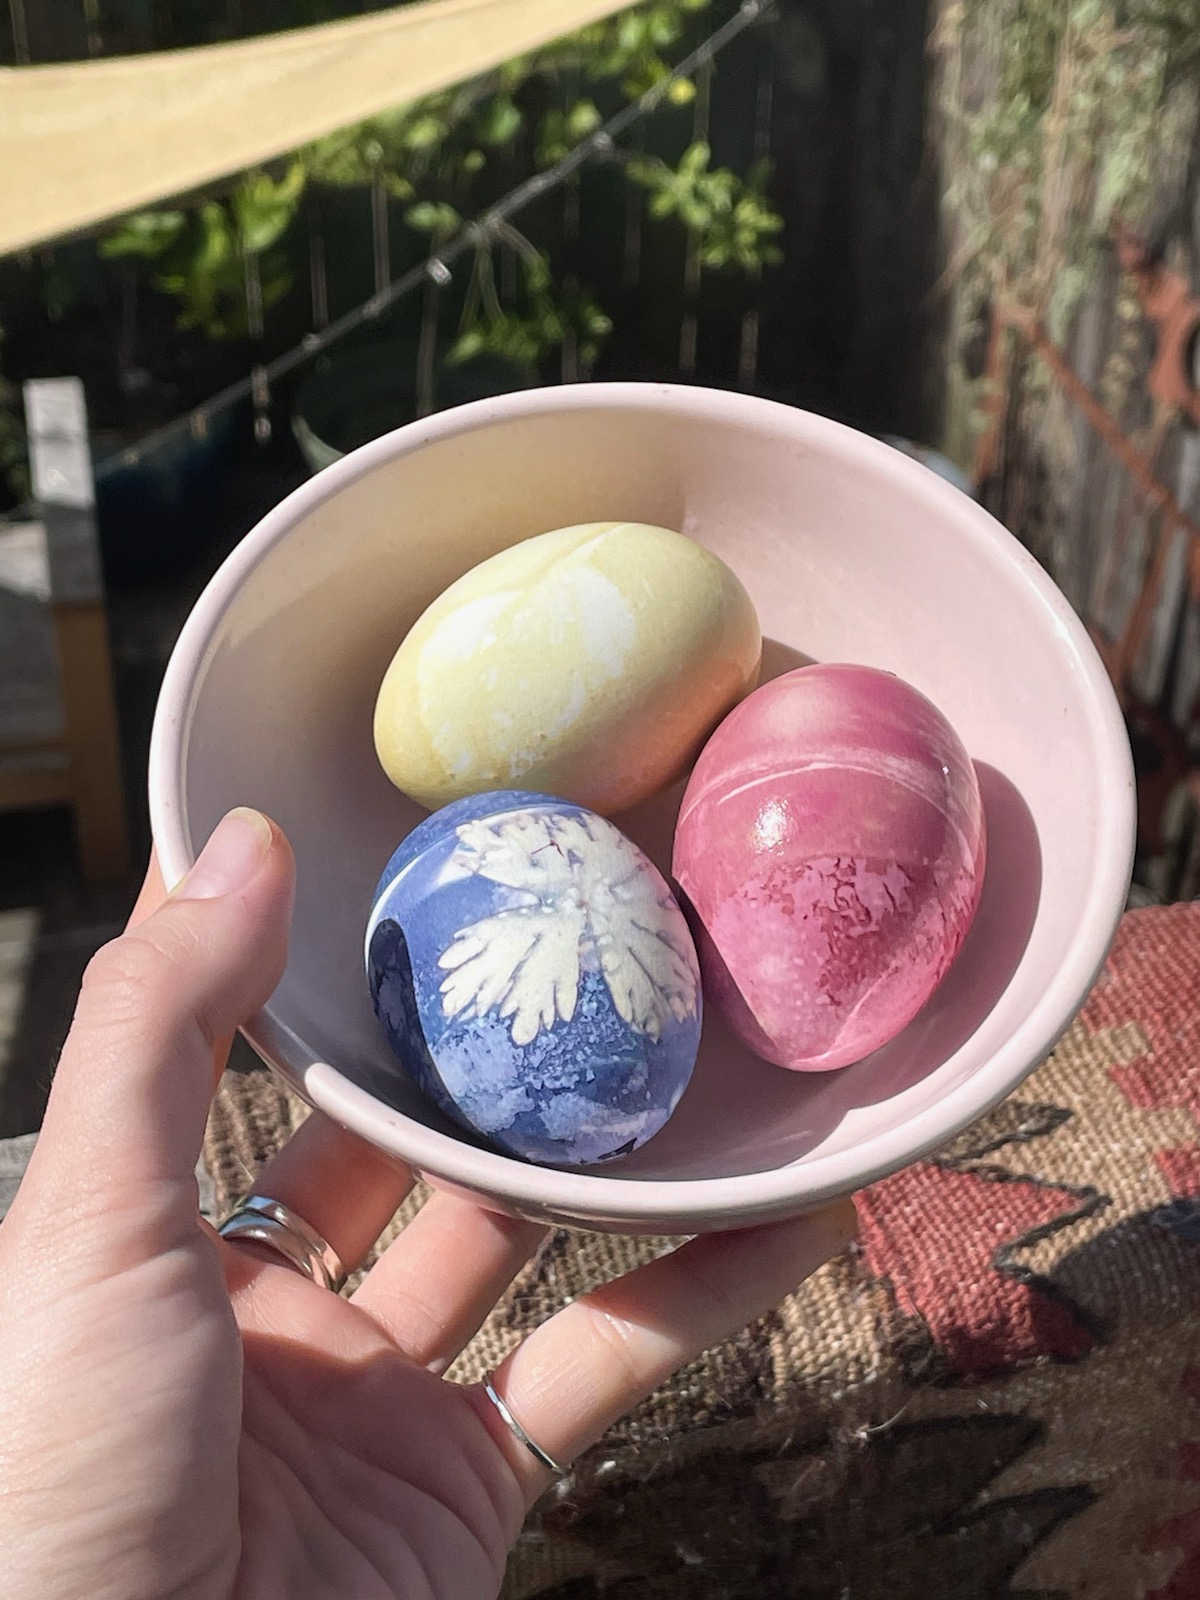
- Create your natural dye. Save food scraps like: onion skins (warm orange-brown), red cabbage (blue), beets and beet roots (magenta), or avocado skins (pink). Place like scraps together in a pot, cover with water, and bring to a boil. Simmer for 30 minutes to 1 hour.
- Prepare your botanical decorations. Collect plant cuttings like small weeds, flowers, and leaves. Dab your finger into water, then onto the egg’s surface to gently “attach” plants to the egg’s surface.
- Cut a band of the nylons or panty hose. Wrap the egg to hold the plant cuttings in place. Gently tie a knot or tie with twine to secure.
- Prepare for dying! Strain out food matter, pour dye into a mug, then add vinegar. Tip: use about 1 tbsp of vinegar for each cup of water
- Submerge your eggs in dye for several hours – even overnight! If you plan to eat your hard boiled eggs later, be sure to store in the refrigerator. Use a spoon to scoop eggs out occasionally to check the color.
- Embrace experimentation! Try moving eggs to different dyes or mixing dyes to combine color tints. When the eggs reach the desired color, place on a cooling rack to dry. Unwrap, rinse if you’d like (it may fade color slightly), then enjoy your beautiful eggs!