The beauty of spring is enhanced by the abundant blooms of flowers growing around our neighborhoods and in nature. Why not create a colorful textile garden for your own home environment? It will last year-round and will not require regular watering or sunlight — low maintenance! In this activity, you will create a fabric batik of flowers. A batik is a wax-resist fabric dyeing technique, originating in Indonesia, that most often utilizes two or more colors.
INSPIRATION
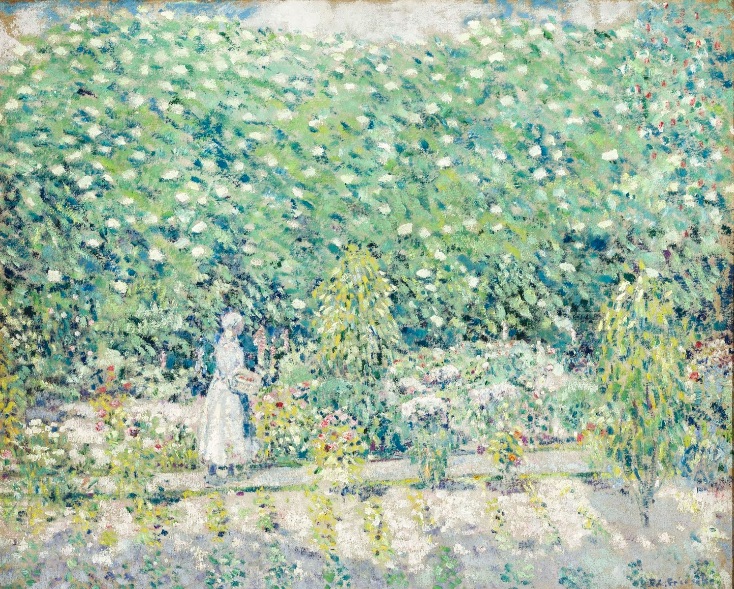
Frederick Friseke (American, 1847–1939), In the Garden, Giverny, circa 1900–1905, Oil on canvas, Framed: 35 ⅜ x 41 ½ x 4 ⅛ in., Museum purchase, James F. Brace Fund & George S. Frierson, Jr. Fund, 2008.1
MATERIALS
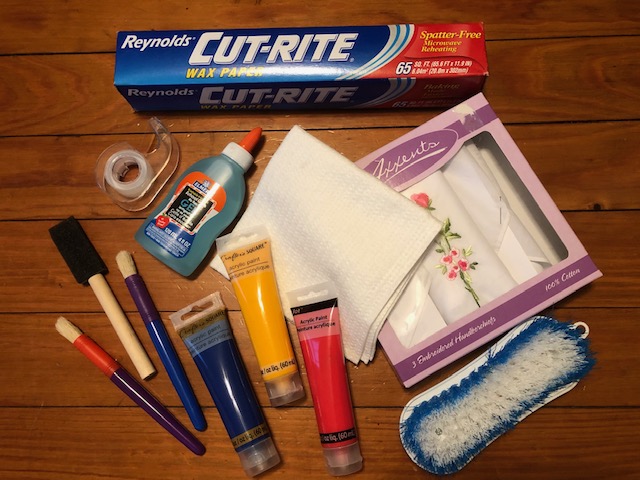
- White Cotton Fabric (Recommended: 100 % cotton handkerchief)
- Washable Gel Glue
- Acrylic Craft Paints (Recommended: Liquid paints or tube paints watered down)
- Paint Brushes
- Scrub Brush or Nail Brush
- Wax Paper
- Tape
This activity requires three phases.
DIRECTIONS

Phase I:
- Place your fabric piece on a piece of wax paper. Tape the edges to avoid shifting or blow-aways if working outdoors.
- Draw multiple, large, blooming flowers on the fabric with the squeeze bottle glue* as your tool.
*Elmer’s Blue Gel glue works best for this activity.
3. Allow your glue designs to dry completely.
Phase II:
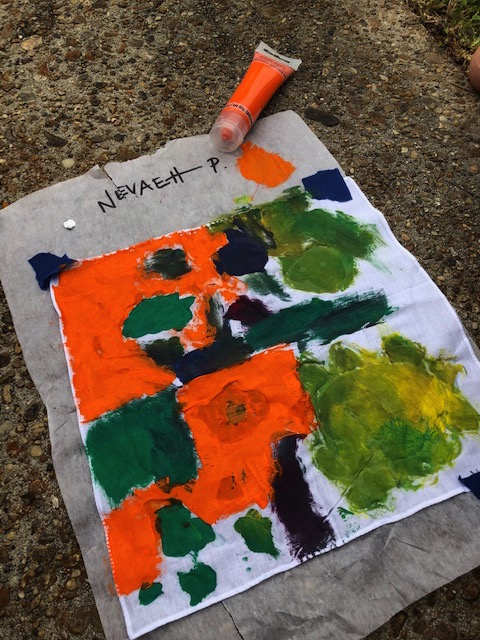
- Paint over the entire surface of fabric* and dried glue with liquid acrylics. Use a variety of colors in different spaces. *Yes, It’s okay to “fill-in” the negative space (fabric space without glue design) with color as well.
- Allow the paint to dry fully.
Phase III:
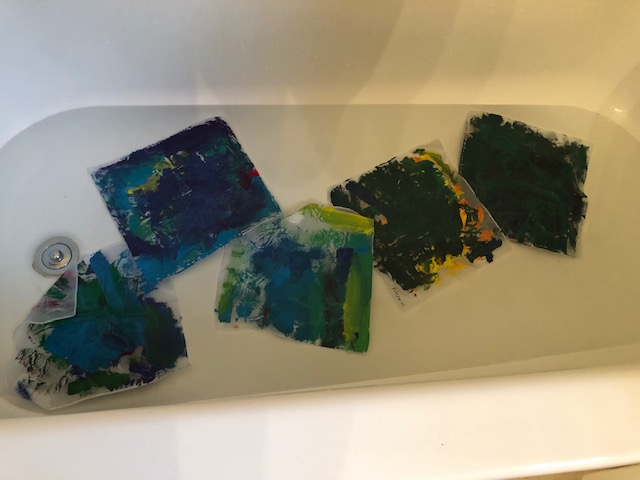
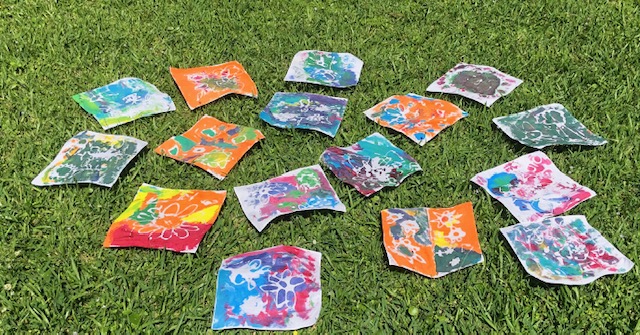
- Remove fabric from wax paper and tape. Soak the painted glue batik fabric in a tub of warm/hot water to soften the glue.
- Scrub the softened glue off with a scrub/nail bush. Some of the paint will be removed as well but that is okay. The removed glue will reveal your design in the underlying white.
- Hang your fabric to air dry.
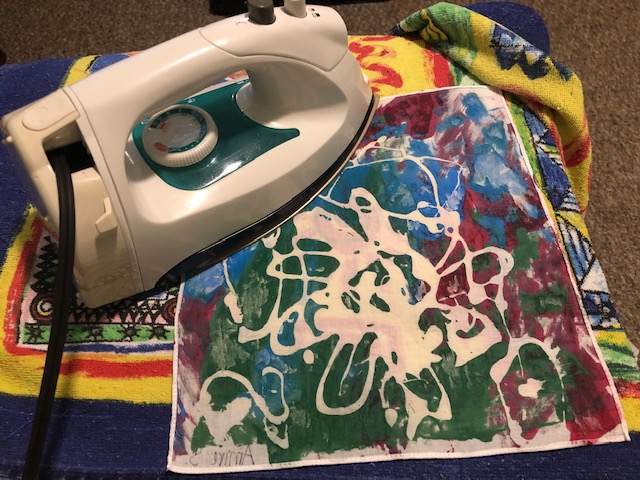
(Optional: Once dry, place in a towel, fold a portion of towel over the batik, and iron on high heat to help release wrinkles.)
LESSON ALTERNATIVES:
Modify the activity to create a “fruitful” seasonal batik using pre-cut, assorted fruits and vegetables. Dip these into plates of glue and “press” the design onto fabrics. Press and lift, making designs and patterns over the entire surface of the cloth.
Make an easy, non-toxic dye to use instead of paint! Mix two packets of Kool-Aid (with no sugar added) and one cup of white vinegar. Dip fabric with dried glue designs into a whole container of dye-mixture or prepare a variety of color dyes and “paint” onto fabric.
Follow all steps required—soaking, washing, and scrubbing steps—after the glue designs dry.
LESSON EXTENSIONS:
Create simple resist designs using waxy crayons or oil pastels and watercolor paints. Draw on plain paper with crayons/pastels then paint over with a coat of watercolor.
You will see how the waxy component resists (or repels) from the water (color) and your design will stand out.
Make a seed collage or mosaic using assorted bird seed. Prepare a design, then glue onto heavy paper or cardboard. Once glue is dry and all seeds are in place, paint over with a variety of acrylics.
Design a faux-floral bouquet using gift wrap tissue as petals. Fold multiple pieces of tissue accordion-style, bend and fold and secure with tape or pipe cleaners. “Peel” apart layers of paper and see your flower “bloom”! Pipe cleaners could be used as stems too!